Happy October!! The air is getting a slight crispness to it and it's time again for the Diva Blog Hop!! This month's theme focuses on what I consider to be one of my absolute FAVORITE tools/accessories--the Framelits (to be used with the Big Shot)!! If you're joining me from Amy's Blog, I'm the last stop for today. If you just started here, feel free to head to Sue's Blog and start from the beginning to hop thru all the sites!
I will be the first to admit that I am a total CASEr--(Copy And Share Everything), and with the start of my academic year on campus being a tad crazy, I just haven't had the time to sit down and create like I would like! Soooooo, I did some browsing and found a couple cool samples (that I DID add my own twists to) that I had SO much fun sitting down to make for today's post!

First up, the card on the left. For this one I used two different Framelits on the card, the maple leaf image from Leaflet Framelits (138283) AND the curvy banner from Bitty Banner Framelits (129267). Both items are in the annual catalog.
To start on this card, I first ran my Crumb Cake cardstock thru the Big Shot with the Woodland Textured Impressions Embossing Folder (139673) that is in the Holiday Catalog--LOVE this embossing folder! Then I placed the embossed cardstock on my cutting pad on my Magnetic Platform (130658), laid the maple leaf framelit in the middle of the card (you can use a post-it note if you don't have the Magnetic Platform to help hold the framelit in place), finished creating the 'Big Shot Sandwich' and ran everything thru the machine. Then I centered/placed the Crumb Cake cardstock on top of my folded Delightful Dijon cardstock (don't adhere it yet!!). I took a pencil and lightly traced around the edge of the leaf. After taking away the Crumb Cake cardstock, I used that guide to ink up my maple leaf from Vintage Leaves stamp set (138802) in Delighful Dijon ink and stamp on the same-colored cardstock. The ink does dry right away, but I gave it 2-3 minutes before I then went in and erased the pencil marks, just to be on the safe side!

Before adhering the Crumb Cake cardstock to the front of the card, I also took my 1/8" hole punch and punched a hole on either side of the leaf stem and ran the Gold Cording Trim (139618) thru the holes and tied a bow on the front of the card. I find this method can sometimes be easier than trying to tie a free-form bow that attaches with a Glue Dot!. I also SHOULD have remember to staple (using the Handheld Stapler [139083]) the Into the Woods 3/8" Cotton Ribbon (139612) on the upper right corner to just the front (in order to hide the back of the staple), but I wound up remembering AFTER I had gotten the front taped down!

I also had fun using the Acorn Builder Punch (139681) & Acorny Thank You stamp set (139718). I stamped 'THANKFUL' in Pumpkin Pie ink on Very Vanilla cardstock and placed the curvy banner framelit over the top (using the same method I used earlier for the leaf) and cut out the image. The acorn top/bottom was stamped with Early Espresso and Rich Razzleberry inks and punched out and attached together. I attached the acorn to the front of the card using Dimensionals, and placed the 'THANKFUL' banner over that, again with dimensionals. SUCH a fun card to complete!!!

Now, for the second card, at one of the Diva Days this past spring, Diva Deb had a SUPER cute Easter card she made using the Mini Treat Bag Thinlits (137547)--and if you would like to check it out, feel free to click HERE--and then be sure to come back for the rest of this post!! Ever since then, however, I have SO wanted to use the framelit set to make a similar style of card, and with Card #2 for today, I finally did!!! Now, I'm again using the Bitty Banner Framelits (129267)--really, with only three shapes, it's a great go-to framelit set! In addition, I'm using a ticket shape from the Tags & Labels Framelits (138282) as well as a paperclip shape from the Project Life Paper Clip Thinlits (138284)--LOVE these!!

I'm again using Acorny Thank You stamp set (139718) and Woodland Textured Impressions Embossing Folder (139673), as well as the Bohemian Borders (138938) for this card. To make the sleeve you just need one of the small pieces and one of the larger pieces for the Mini Treat bag (to make the bag, you'd need two of each). I ran the Crumb Cake cardstock thru the Big Shot with the Woodland embossing folder, then taped up the sides/bottom to secure it! I wrapped some white Baker's Twine around the sleeve and tied a bow on the front of the card. The acorns were stamped in Old Olive ink and Soft Suede ink on Whisper White cardstock and punched out, and the ticket and paperclip were cut out on the Big Shot out of Rich Razzleberry cardstock.

I stamped the 'Grateful For You' image in Rich Razzleberry & Soft Suede ink and used the large banner framelit from the Bitty Banners set to cut it out--I did wind up trimming down a little bit of the banner on the left side. I attached the acorns and banners to the front of the card using Glue Dots

Once the outside was complete, it was time to turn my focus to the insert, which was a piece of 3 1/2" x 5" Old Olive cardstock. I first stamped one of the borders from the Bohemian Borders set on the top & bottom of the Whisper White cardstock in Rich Razzleberry ink, folded and stapled the ticket shape (to create a tab) on the upper right side, and attached the final acorn on the lower left corner or the card. Insert into the sleeve & DONE!!
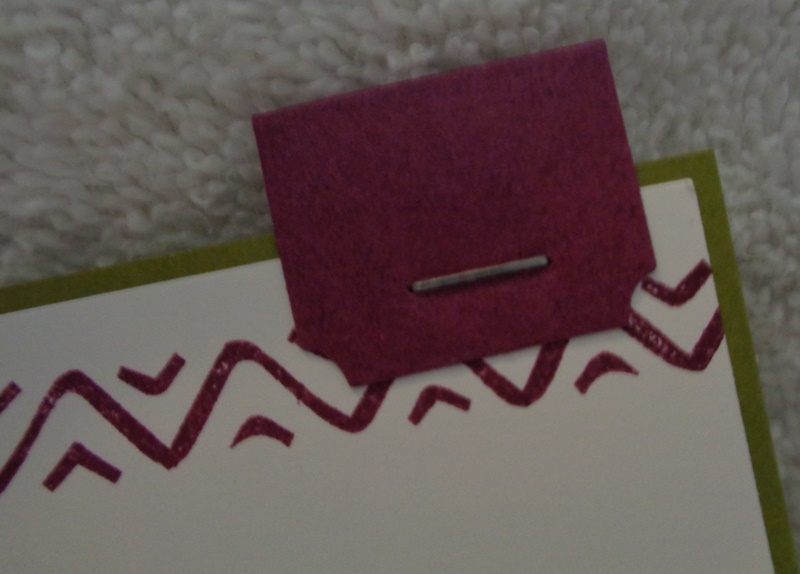
I had so much fun making both of the cards for today!! Here's a final look at both pieces of Card #2:

I hope you've enjoyed the Blog Hop stops along the way today! For quick reference, here are the links to everyone's sites:
Happy Hopping!!
Pam
No comments:
Post a Comment