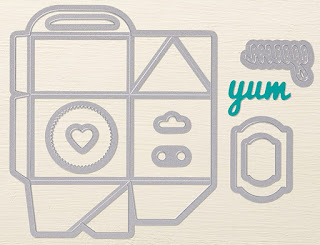
I absolutely LOVE the new Framelits in the catalog, and when I came across the Baker's Box dies, I KNEW I needed to order it immediately, and I have to tell you, I am having a lot of fun with them!
 | |||
| Baker's Box Thinlits Die Set 138279 Price: $33.00 (US) 9 dies Finished box size: 4-1/8" x 2-1/8" x 2-5/8" |
The box comes with three different closure styles, and I 'think' Emily is going to go with the double hole option (center box in photo above), but a bride is entitled to change her mind, so I'm not holding her to that decision yet! ;)
To make the box, you'll have to cut the box template out twice. The Magnetic Platform is ideal for this step.
In the tutorials/advice I've seen on assembling the boxes, it's suggested to NOT cut out the top closure at the same time as the box. My conundrum was that I wasn't sure how to get the handle openings to line up correctly (so that both sides matched), and it took me a while to come up with a solution. But it's super low-tech! Post-It Notes! I used a Post-It to temporarily secure the wrong sides of each box together, lining up the top handle, then used another Post-It to hold the closure die to the cardstock and then ran it thru the Big Shot as usually. Having the double layer of cardstock does leave a bit of an indentation on the cardstock, so my advice is to emboss the pieces AFTER cutting out the closure openings.
As far as assembling goes, I also recommend folding all of the crease lines BEFORE putting it together. Also, you'll want to use a more permanent adhesive, such as Sticky Strip or Liquid Glue (which will need a bit more dry time) on the side flaps. I also used a couple glue dots to help hold the base of the box together a bit better.
Stampin' Up! also has a You Tube video about some of the basics to go with this box, too, so feel free to check out the link!
I hope you've enjoyed checking out this New Catalog Item, as well as the other stops along the way today!!
For quick reference, here are the links to everyone's sites:
Happy Hopping!!
Pam


